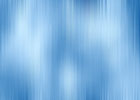
Graphic Design Education presents how to create abstract wallpaper in Adobe Photoshop. A professional creative graphic designer always designed or created to lot's of abstract thing such as abstract wallpaper, abstract photo, abstract web elements etc. So it is very important that if you wanted to be a creative graphic designer, you have to learn how to create lot's of abstract thing. Today we learn how to create abstract wallpaper in Photoshop. This is very simple and easy tutorials for learning. Its have only few steps so that you can got it within a moment and Everybody knows Graphic Design Education always try to presents difficult tutorials in easily and simply so that you people understand it effortlessly.
Application : Adobe Photoshop CS
Difficulty : Beginner or New to Photoshop
Complication Time : 15 minutes only
Application : Adobe Photoshop CS
Difficulty : Beginner or New to Photoshop
Complication Time : 15 minutes only
How to create abstract wallpaper in Photoshop - Graphic Design Education
don't know whats going on... don't know what with wrong... fills like 100 years... sorry! what am i writhing? ohhh.. that's a song! but abstract thing like as that song. Ok.. enough!... lets start our learning.
Step 1 : Take a new page & set the foreground and background color.
Take a new page or new canvas from File > New set the Width: 800 px and Height: 600 px or press Ctrl+N from keyboard to take a new canvas.
Now set the foreground and background color. This steps is very important cause you should be very careful about choosing color. You should select abstract color. Now if you ask me whats the name of abstract color? Than i have to sing that song again cause there is no name of abstract color. Anyway in this tutorials we try to use abstract color hopefully you should like this color.
Click the set foreground color icon from the tools bar and set Deep Sky color as foreground color and the color code is #1B5484. set White color as background color and the color code is #FFFFFF.
Step 2 : Make some clouds and adjust brightness.
In this steps we will make some cloud. It is very easy just Go Filter > Render > Cloud and see the all canvas fill with clouds.
Already we gets our clouds. Now we have adjust it's brightness.
Go Image > Adjustments > Brightness/Contrast a window will come set the Contrast to +50 before click OK check the Use Legacy option. Then you will see image like below.
Step 3 : Apply two more Filter - Last step | Graphic Design Education
Almost we are going to finish this tutorials. Now we apply here only two more Filter to finish this wonder abstract wallpaper.
Go Filter > Distort > Ocean Ripple a dialog box will come set the Ripple Size: 11 and the Ripple Magnitude: 15 then click OK.
Now apply another filter.
Go Filter > Blur > Motion Blur then set the Angel 90° and set the Distance 260 then OK.
At last we finish this tutorials and see the final image below.
Thank you for learning this nice tutorial presented by Graphic Design Education. Hope you learn it nicely. If you have any question or advice please comment us.
Thanks.


No comments:
Post a Comment