Application : Adobe Photoshop Cs (more)
Difficulty : Beginner or New to Photoshop
Complication Time : 20 minute
How to create Snow Effect in Photoshop - Graphic Design Education.
Yes! I can remember when i was study in school, my teacher told me write a paragraph about the season you like most. I write a paragraph about winter season cause I like winter season very much. Today when i try to write a post about how to create snow effect in Photoshop I fill my past very much.
Anyway, let's begin our tutorial.
Step 1 : Open an image
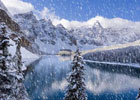
For creating snow effect in Photoshop we need a image or wallpaper. You can use any image but one thing should remember photo must be related with winter season. If you use a photo of summer and add snow effect with summer photo then it will be very funny! Don't worry we use here a photo of winter season. you can use this photo or as your wish.
Step 2 : Take a new layer and Fill it with black
After open the image go layer palette click on the icon of create new layer or press Shift + Ctrl + N from keyboard. A window will come Click OK.
After taking new layer fill the layer with black. Go Edit menu and click Fill select Black from Use click OK.
Step 3 : Add some Noise and Blur
Here we try to make snow but at this moment we see a black screen. Where is snow! don't worry be patience and keep going. At this moment we add some Noise filter and this Noise well be our snow.
Go Filter > Noise > Add Noise set the Amount: 150%, click on Gaussian and check the Monochromatic option then click OK and the document will fill with some white noise.
Now add some blur for blurring to the noise. We cant easily add blur from filter. Just click on the Filter menu then go Blur > Blur More and blur will apply to the document.
Step 4 : Apply Levels command for reduce the amount of Noise
Already we saw lot's of white noise in the whole document. Now we have to reduce some noise form the whole document. We can reduce some noise applying levels command.
Go to the Image menu click Adjustments then click Levels or press Ctrl+L from keyboard then you will get a command box set all the measurement just like image below. Set value 162 in the first box and set value 204 in the third box then click OK.
When you finish this steps you will see lot's of white noise reduce from the document.
Step 5 : Apply Screen blend mode from layer palette
Now we remove all the black color from the document except white noise cause this white noise will be snow. For removing black colors we change blending mode from layer palette.
First select the Layer 1 then click set the blending mode from layer and select Screen from the list.
After set the blending mode you see the whole document changed there is no black color and white noise seems likes to white snow.
Step 6 : Apply Motion Blur - Final steps of Graphic design education.
For get more real snow we apply here motion blur form filter menu. After applying this filter it's seems to you snow fall down from sky.
Go Filter > Blur > Motion Blur a window will come set the Angle: -65 and Distance: 8 then click OK.
Now Duplicate the Layer 1 for getting more realistic snow effect. Select the Layer 1 first from the layer palette then click Layer menu Duplicate Layer a window will come click OK.
Hopefully you already get your desire effect I mean natural snow effect. Just like below.
Thank you very much joining our Graphic Design Education classes. Have any questions or Advise please comment us.
Thanks.


No comments:
Post a Comment